Wednesday, December 30, 2015

Roasted Cranberries Bundt Cake!

The year 2016 is only one day away. Time surely flies by. What an exciting year 2015 was for me! I learned a lot of new recipes, experienced new flavor combinations and new methods of cooking. It is only fitting to say goodbye to this year in baking style!

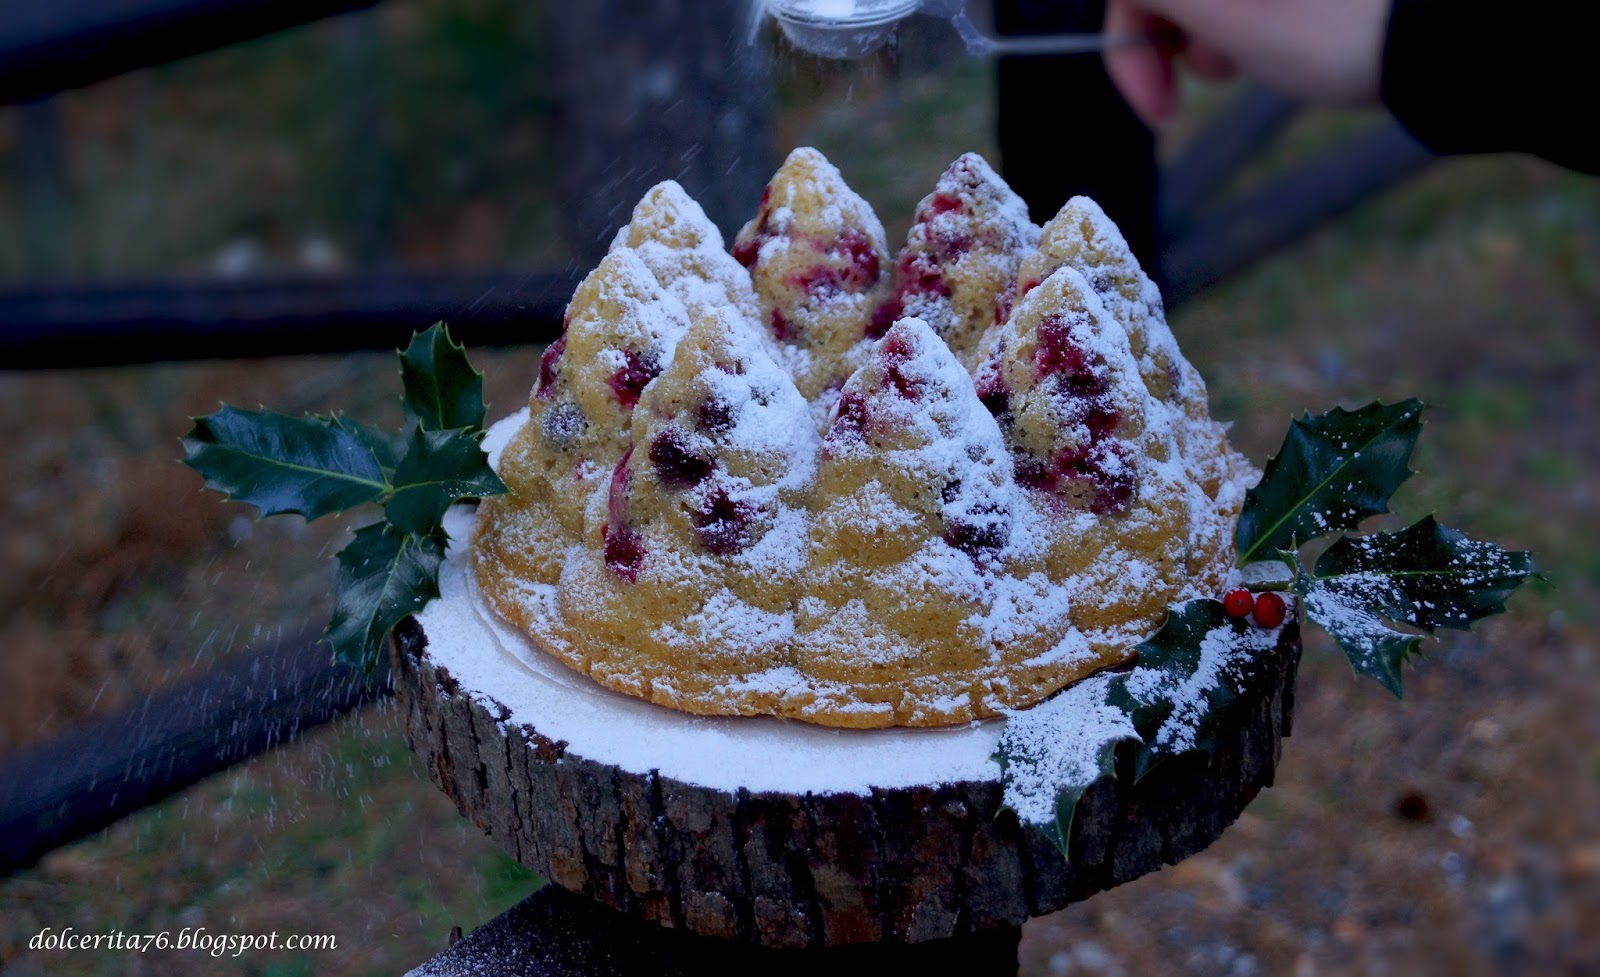
The last bake of this season had to be beautiful and featuring the season's colors and flavors. It  had to be easy to make too as no one wants to be tied down to the kitchen during these festive times! My answer to all of this was a roasted cranberries cake baked in a beautiful bundt mold.


To make this cake you need to start with its flavor base: the roasted cranberry sauce. The process is really straightforward, you just need to get the ingredients and combine them together. For this you will need:
  • 125 fresh cranberries
  • 1 tbsp brown sugar
  • 2 tbsp maple syrup
  • 1 cm of ginger, fresh and grated
  • 1/2 tsp ground cinnamon
  • 1/2 tsp ground ginger
  • 2 strips of orange zest
Combine all the ingredients in a pan, and slowly roast them in the oven at 150C for about 20 min. They will be done when your whole house smells like Christmas!
Let the cranberries mix cool down as you prepare the cake mix. 


 For a pine forest mold with 10 cups capacity you will need, :
  • 3 large eggs at room temperature
  • 150 g soft butter
  • 220 g white sugar
  • the cooled roasted cranberries with their juice
  • 220 g cake flour
  • 10 g baking powder
  • 1/2 tsp salt
  • 150 ml whole milk or cream
  • 1 tsp cointreau (optional)


First combine the flour, the salt and the baking powder and set aside.
In a large bowl, beat the butter with the sugar until creamy. Start adding the eggs one by one, making sure the egg combines well with the dough before adding the next one. 
Now add 1/3 of the flour mix, beat until combined then half of the milk and mix again, repeat with another 1/3 of the flour, then the rest of milk and finally the rest of the flour. Finally, gently fold in the cranberries and their juices.

Pour the batter in the greased and floured pan and bake for about 45 to 50 min in a preheated oven (175C).


Leave the cake to cool in the pan for around 5 min and then flip it over a cooling rack.

Dust with some powdered sugar and enjoy the deep flavors of this wintery cake!

Finally, I would like to wish everyone a Merry Christmas, yet again, and a very happy new year. May it bring you nothing but joy and loads of sweetness!


Tuesday, December 22, 2015

Salted Caramel Candies, a Great Gift this Christmas!


With this post we will continue the series of festive recipes. However, this is a special recipe since it requires only 4 main ingredients to end up with something really impressive!

If you follow my blog you would know that I do love a good caramel. Added in the right amounts, caramel transforms ordinary sweets into spectacular ones. What if caramel is not one of the elements of a recipe but is the actual hero of it? Well that's what this caramel candies recipe is all about.


Following the recipe specified in this post you will get around 21 pieces of candy. I should specify that I used an 8 x 16 cm cake pan. I trimmed the edges of the caramel and cut it into 2 x 3 cm candies.
The only difficulty in this recipe is to get to the right temperature as to have a set caramel but that is not rock solid and to attain this temperature you do need a thermometer. It sounds a bit technical and it kind of is, but these cooking thermometers are widely available nowadays at fairly reasonable prices.

Now, let´s caramel:
  • 200 g sugar
  • 150 g cream (35%)
  • 40 g cold butter
  • 1/2 tsp sea salt or fleur de sel

In a heavy bottom pan add the sugar and let it melt over a gentle heat. Cook the sugar until you get an amber color and you can smell the distinctive caramel aroma. Slowly pour the cream taking extra care not to splatter any of the hot sugar on you.
Continue cooking the caramel for at least 10 minutes and over a gentle heat. The mixture needs to get to 125C (257 F) and when it does, turn off the heat and add the butter whisking well until it  is well combined. Finally add the salt and whisk again for a bit.

Pour the caramel in the parchment covered pan and leave it to cool. Place the pan in the fridge for an hour or two. 

Remove the pan from the fridge. Take the caramel out of the pan and cut it into 2 x 3 cm rectangles. For an extra hit of salt, you can sprinkle a touch of sea salt on the caramel pieces or over the caramel slab before you cut it.

Wrap the candies in wax paper or candy plastic wraps and share them with your loved ones as a special and homemade gift for Christmas. 

Chocolate Christmas Gifts.


Only a few days separate us from Christmas and the pressure is on! I feel I have a million things to do but I don't have enough time. That's why I decided to prioritize and just stick to the basics, and what's more basic than gifting loved ones on Christmas?
During previous years, I baked batches upon batches of cookies and decorated them. The result was wonderful but really time consuming. This year I decided to make simple yet elegant and delicious gift items. Chocolate was the answer!


One of my favorite flavor combinations is that of orange and chocolate. I have used it before in so many of my recipes and I keep on experimenting with it.  Candied orange peels dipped in dark chocolate, known as orangettes, make the perfect gift item and are the ultimate way to do justice to this amazing food pairing. 

I used 3 medium size oranges  which yielded more than 30 orangettes. This should give you an idea and help you adjust the quantities according to your needs.

As orangettes require only two main ingredients  this means that you need to get both of them right. The candied peels need to be sweet enough, bursting with citrus flavor, and neither too soft nor too thin and dry. The chocolate needs to be tempered just right.

Temper more chocolate than you need. This would give you the opportunity to make another excellent and fast dessert that is also a great gift idea: mendiant. Mendiants are made from chocolate shaped like a disk and topped with dried fruits and nuts.

Now let's get started on making these two delicious and easy to make chocolate specialties.


For the orangettes you need:
  • 3 oranges (pick varieties with a rather thick peel) 
  • water
  • sugar
  • the juice of 1 orange
  • 1 tsp of cointreau (or any other orange liqueur) 
Cut off the head and bottom of the oranges, then cut through the skin to get 4 big segments.

Cover with cold water, heat and when the water starts boiling leave it for 2 min then drain the water and repeat the process for 2 more times. This removes the excess bitterness from the peel but keeps the much loved orange flavor.

After the third boiling, drain the peels and let them cool down. Once cooled, cut them into strips and weigh them. Add the same amount of sugar as the weight of the peels. In my case I added 220 g of white sugar.

Add the orange juice, cointreau and then cover with just enough water to cover the peels.  Cook for about an hour. Leave the peels in the syrup for an additional  hour, or until they cool down completely, then remove them and let them dry for a day over a cooling rack!


Now it's just a matter of dipping the orange strips into the chocolate. I  personally like dark chocolate for this recipe, but you can use the chocolate you prefer. 
Temper the chocolate, with the technique you like. I tempered around 300 g.
Just dip about 3/4 of the orange strip into the dark chocolate  and place them on a parchment paper until they harden. 


For the mendiant:
Spoon some melted and tempered chocolate on a parchement or wax paper, swirl a bit to get a beautiful disk shape then drop the nuts or candied fruits of your choice. Ever so gently press the surface of the nuts and fruits to make sure they stick to the chocolate once it hardens. 

Arrange a collection of orangettes and mendiants in the boxes of your choice to make great gifts for your loved ones during Christmas. 

Sunday, December 6, 2015

Ferrero Rocher Brownies!


We're only just few weeks away from Christmas and I couldn't be any happier! 
Christmas has cast its magical spells all over Madrid. The lights, the special Christmas markets, the masses of crowds shopping and the many little things here and there make this time of the year truly wonderful and my favorite.


Ferrero Rocher chocolates are delicious any time of the year, however, they are definitely more popular during Christmas as they make a really nice and tasty gifts. In preparation for Christmas I bought some boxes and I have to say they do make a fancy addition to the dining room table! As I love mixing and experimenting, I decided to create a special holidays brownies, a posher version if you want, using the delicious Ferrero Rocher chocolate balls. Besides being so popular and delicious brownies are extremely versatile and everyone seems to have a special or favorite recipe. With one star ingredient, this would be my special take on brownies for the holidays. They are definitely more indulgent but still easy to make and bake and above all a joy to share with your loved ones during this season of sharing.  


So let's get started. For 9 generous servings you need:
  • 150 g 72% dark chocolate
  • 120 g unsalted butter
  • 100 g white sugar and 50 g dark brown sugar
  • 50 g flour
  • 2 eggs
  • 10 g cocoa powder
  • dash of salt
  • 1 tsp vanilla extract
  • 1/2 tsp instant coffee
  • 30 g pralinĂ© paste


Line a 18 x 18 cm pan with parchment paper. Sift the flour and the cocoa powder and add the salt.

In a double boiler and over a gentle flame, melt the chocolate and butter. Add the instant coffee and the praliné to the melted chocolate and butter mix and combine well until it dissolves. Coffee enhances the flavor of chocolate, but don't add too much as its powerful taste can mask all other flavors!

When the chocolate mixture has cooled, add the sugar followed by the eggs and the vanilla. Mix until everything is combined well. Now add the sifted dry ingredients, and mix well.

Pour the batter into the pan. Add the Ferrero Rocher but don´t put too much. Just make sure each piece of brownies will have one in the middle,  


Bake for about 25 to 30 min in a preheated oven (180C).


Try my Ferrero Rocher brownies for a jazzed up classic suitable for the holiday season. Enjoy!