Wednesday, October 29, 2014

Spicy Pumpkin Cookies, a Treat for Halloween


Pumpkins are now officially a culinary obsession of mine. Although nowadays it's readily available your long, it's mostly in autumn that I like to buy it every time I go food shopping. 
Once home, I roast pumpkins and divide them into small portions. I use what I need and freeze the rest for later. Roasting pumpkins really brings out their natural sweetness and imparts a delicate smoky flavor to their flesh. I puree the roasted pumpkin and use them in as much recipes as possible. 


This time, I wanted to use pumpkin in a sweet treat specially made for Halloween. The pumpkin flavored sugar cookies will be decorated and themed to fit for this special holiday, I love decorating cookies but I don't always have the time to do so, this occasion gave me enough motivation to get back to do what I really enjoy doing. 


Getting the cookie the perfect shape to be iced and decorated is really a tricky job, especially if you want to modify the ingredients of the basic sugar cookies, which I intended to do! 

I headed to the kitchen and played around with the basic recipe and luckiIy I got the texture and taste that I wanted. The addition of the pumpkin created a whole new flavor dimension to the cookies and even if you don't want to decorate them, trust me, you will enjoy their taste and I can guarantee that your home will be filled with an enchanting and festive aroma for the whole day!  

Let's get baking!


For the cookies you need:
  • 440 g flour
  • 160 to 180 g panela sugar (I used 160, 180 if you´re not decorating with royal icing)
  • 6 tsps of cocoa powder
  • 1/4 tsp of ground cloves, 1/4 tsp ground star anise, 1/4 tsp grated nutmeg
  • 1/2 to 1 tsp of ground cinnamon (to your liking)
  • dash of salt
  • 180 g  of butter, room temperature
  • 1 egg at room temperature (you need a small egg or 50 g of a larger one)
  • 60 g roasted pumpkin purée
Start by sifting the flour, cocoa powder, spices and salt and set aside. 
With a paddle attachment (if you don´t have one use whisks) beat the butter for a minute, add the sugar and the pumpkin purée, beat for 2 or 3 min until well combined. Add the egg and beat again for just a couple of minutes.

Add the flour mixture, and mix just a little bit at a low speed and stop even if not all the flour is combined. Drop the dough over a clean working surface and gently knead until the dough comes together.

Form your well combined dough into a 2 cm (just over 3/4 of an inch) thick rectangle  and wrap it with plastic film or put in a ziplock bag and leave in the fridge for at least 4 hours or over night.

Cut your cookies using the shapes and molds you like and bake them for about 10 to 15 min in a preheated oven (180). The baking time will depend on the thickness and the size of the cookies! Keep an eye on them and bake them until the edge is slightly golden. 


If you want to decorate these cookies in a more elaborate way then follow the steps I explained in the chocolate cookies post I made for Easter!

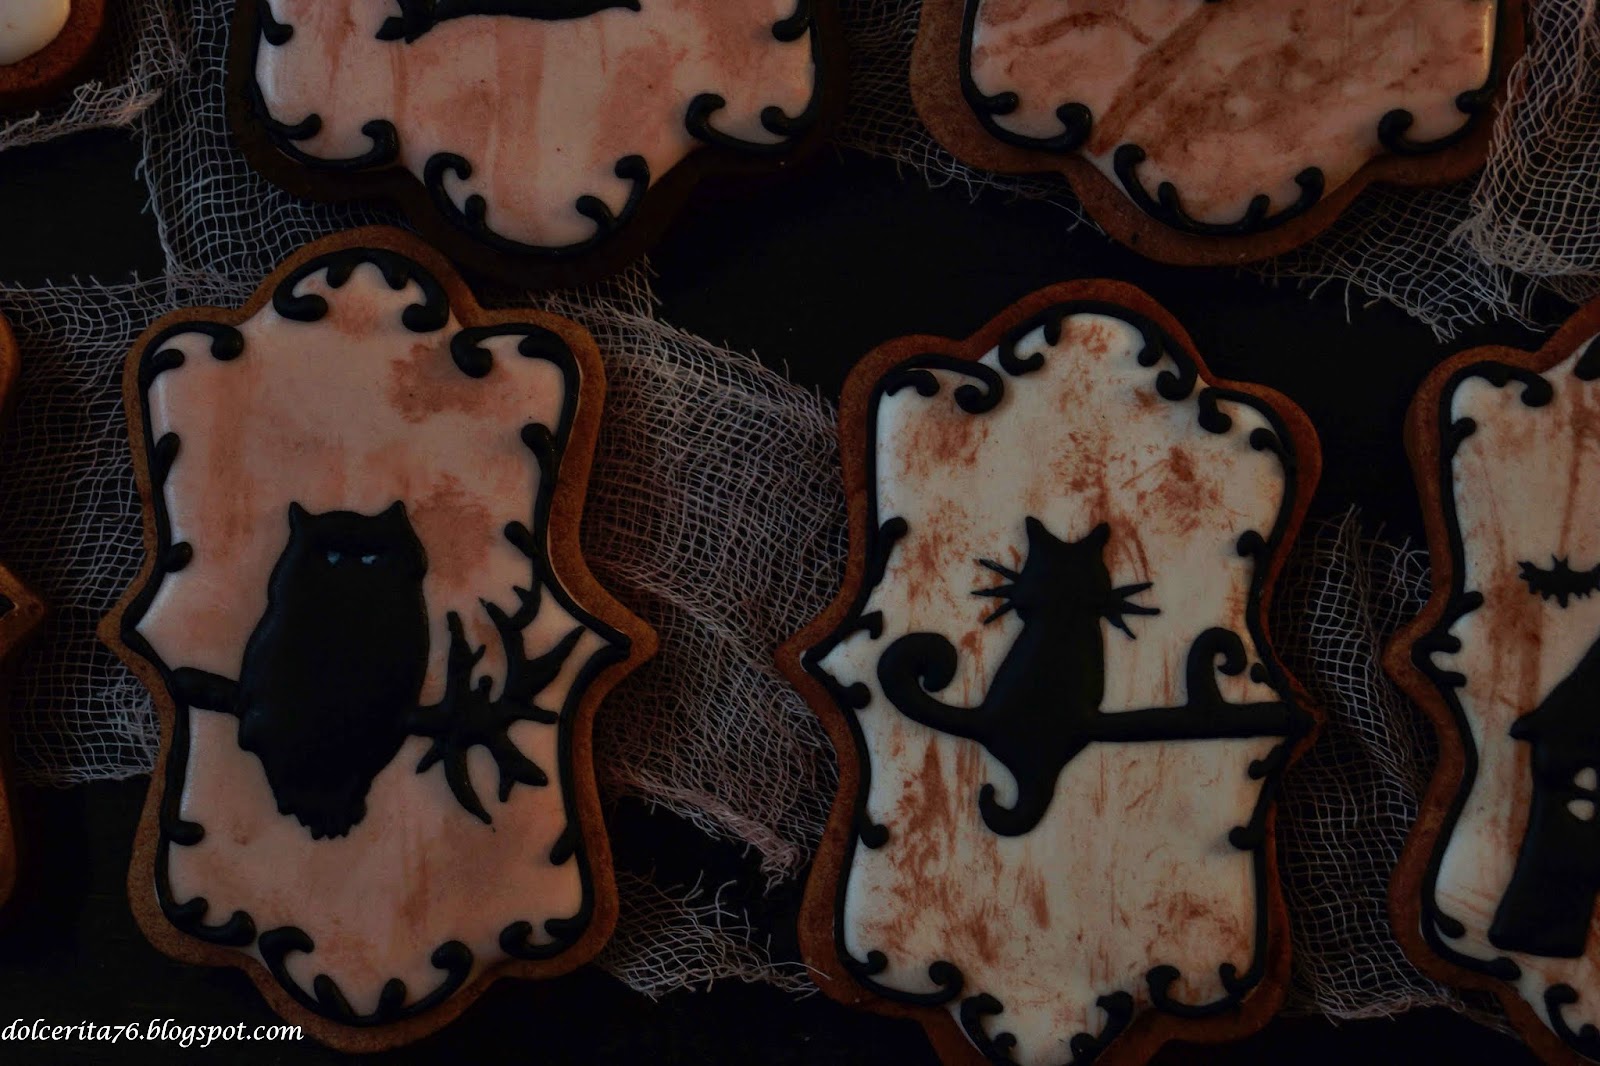
For this occasion, I opted for a simpler decoration, I pipped the silhouettes with  royal icing and added black filigree on the edges for a dramatic finish. To give the iced cookies a vintage and darker look I used cocoa powder brushed gently over the surface of the iced cookies.  

Happy Halloween everybody!

Thursday, October 23, 2014

Wild Blackberries Pie


Madrid is just beautiful in Autumn, the weather is perfect, the colors of the city start changing to offer  beautiful scenes throughout its streets and especially in its numerous parks. To top that, just few kilometers outside of Madrid you can explore the most amazing villages and mountains dotted with beautiful forests, rolling hills and much more. Pines, oaks, chestnuts  are some of the many trees you would find there, even more, scattered throughout these villages and forests you find lovely blackberry bushes. Blackberries are not only beautiful to look at but they have a unique acid flavor that's quite addictive. Picking them from the wild brings back many of my favorite childhood memories.


Not far from Madrid there's a small village by the name of Rascafria. Blackberries there seem to ripen later in the season and I couldn't pick any fruits until the first week of October. The first batches I picked were consumed fresh, as they were pretty hard to resist, however, I picked some more to use in a delicious and easy to make pie.


To make this pie you need a really nice and flaky pie dough and two main ingredients for the filling, that's it!
If you're feeling lazy or don't have enough time, you can buy a ready-made pie crust, but make sure that it is made with butter! However, once you master the art of making a good flaky pie crust you can never be satisfied with bought ones. Often, I make more dough than I need and I freeze the rest to be used later on.

For the crust you need
  • 400 g flour
  • 220 g very cold butter, cubed
  • 2 tbsp sugar
  • A pinch of salt
  • Ice water, between 4 to 6 tbsp   
To get a flaky and delicious crust you need to work with  ingredients that are really cold. I start by mixing the dry ingredients in the food processor and place the container in the freezer for about 20 to 30 minutes. You can omit this step, I have done so in the past and have gotten very good results, but it is worth the time investment as the dough will be even more crumbly and flaky when all ingredients are cold. Meanwhile, prepare the butter by cutting it into small cubes and then freeze them until they are very firm.
I then take out my ingredients from the freezer, add the butter to the flour mix and pulse for about 30 sec to one min maximum. Then I add the icy cold water, one tbsp at a time. This is where you need to be careful not to add too much water and not to overwork your dough. Once the dough just barely comes together stop mixing. It is acceptable if the dough does not come together in a single ball, that's not the aim.
Now, line a clean working surface with cling film (or aluminum foil if you prefer), remove the dough from the food processor onto the cling film. Work the dough slightly with your hands so it comes together and shape it into a disk. Cover it with the cling film and place it in the fridge for at least an hour. It is better if you prepare the dough one day ahead, which is what I usually do.
The amount of water that you will add depends on the quality of the flour and the water contained in the butter. Don't be tempted to put more water as the dough might seem dry at first, but when it rests in the fridge, it comes together nicely and the butter is absorbed  by the flour.


Now that you have the dough, it's time to prepare the filling and for it you need:
  • 300 g wild blackberries (or any other berries you prefer)
  • 60 g sugar (I don't like the filling to be too sweet, but if you want it to be sweeter, add more sugar)
  • The seeds of a vanilla pod or 1 tsp of vanilla extract
  • a dash of cinnamon (optional)
  • Cream and sugar for the top
Once you have all your ingredients ready, just mix together and you're done, the filling is ready to be poured into the pie shell.

Remove the pie dough from the fridge 10 to 15 min before you start working with it. Cut it into two portions, with a bigger one for the base and a smaller portion for the top. Roll out the base portion out until it's 6mm thick and it's big enough to cover the pie pan. Pour the fruit mix into the pan.

For the top layer, you can roll it into one single layer or you can get creative and create a lace effect like I did and cut some pie into nice leaf shape. Whatever design you might do, don't forget to leave enough room for the steam from the cooking fruits to escape or else the pie would be too wet.

Finally, brush the crust  with cream then sprinkle with sugar for  extra crunch!

Bake the pie in a preheated oven (180) for at least 40 minutes. Note that the top will bake faster than the bottom of the pie that's why cover the top with aluminium foil, and remove it after 20 to 30 min
of baking.

Serve the pie with some whipped cream and a sprinkle of cinnamon! Enjoy!

Wednesday, October 15, 2014

Spicy caramel and maple apple cake


Summer does fly by. Adios vacations, bright sun, sandy beaches and the great outdoors. Autumn is back, Madrid is getting cooler. The first rains and the amazing colors of trees as they change from dark green to pale yellow and fiery red announce the creeping winter. But I love autumn, its wonderful sights, the smell of fresh earth after the rains and especially I love its delicious fruits. Without a doubt, apples are the quintessential late summer early fall fruit. Although I love eating fresh apples, I do think that this fruit in particular tastes even better when cooked especially if combined to certain spices that bring out the best in apples.


This autumnal recipe features apples as a key ingredient. I was lucky enough to have had the chance to pick apples fresh from an orchard close by to where I live. These were small fruits, packed with flavor and tart. They stay firm when cooked which was what I exactly wanted. The hardest part of this whole operation was peeling and cutting the fruits. 

For this recipe using an 18 cm pan you need:

To prepare the apples:
  • 200 g of apples peeled, cored and cut into cubes
  • 30 g sugar
  • 1 tbsp maple syrup
  • 15 g butter
  • 1 tsp cinnamon
  • 1/4 tsp of ground cloves and 1/4 tsp ground star anise and some grated nutmeg

Combine all ingredients in a pan, and cook the apples over a medium flame until slightly tender and caramelized.Set aside to cool.


To prepare the cake:
  • 2 large eggs (room temperature)
  • 60 g of sugar (if you´re not going to top the cake with caramel double the amount of sugar)
  • 60 ml of vegetable oil (I used sunflower, but any neutral vegetable oil will do)
  • 170 g of flour (I used full grain spelt flour)
  •  tsp and  half  baking powder
  •  tsp of maple syrup and 1 tbsp of caramel sauce (or 2 tbsp of maple)
  •  tsp of cinnamon
  •  tsp vanilla essence
  • 100 g of the cooked apples
  • pinch of salt
  • greased and dusted 18 cm pan
  • 1 tbsp caramel to drizzle on top


Combine the flour, cinnamon, salt and baking powder and set aside. Whisk the oil with the sugar for a minute, add the eggs one by one and when well combined add the maple syrup and caramel. Finally fold in the flour mixture. When all the ingredients come together, pour the batter in the prepared pan, add the cooked apples on top and sprinkle the tbsp of the cramel on them. You  can mix the apples with the batter if you want. Bake the cake in a preheated oven (180C) for 25 to 30 minutes, check with a toothpick to make sure the center is cooked through.


The caramel I used in this cake can be prepared using  this recipe. However, I made just half of the amount and I replaced water with the juice released from the cooked apples infused with the spices, and let me tell you, the result was out of this world.

Serve the cake with the rest of the cooked apples with a drizzle of caramel and enjoy a sweet taste of autumn!